
The complete guide
How to Choose and Use a Bike Tow Dog Leash
The problem with holding a lead while you ride
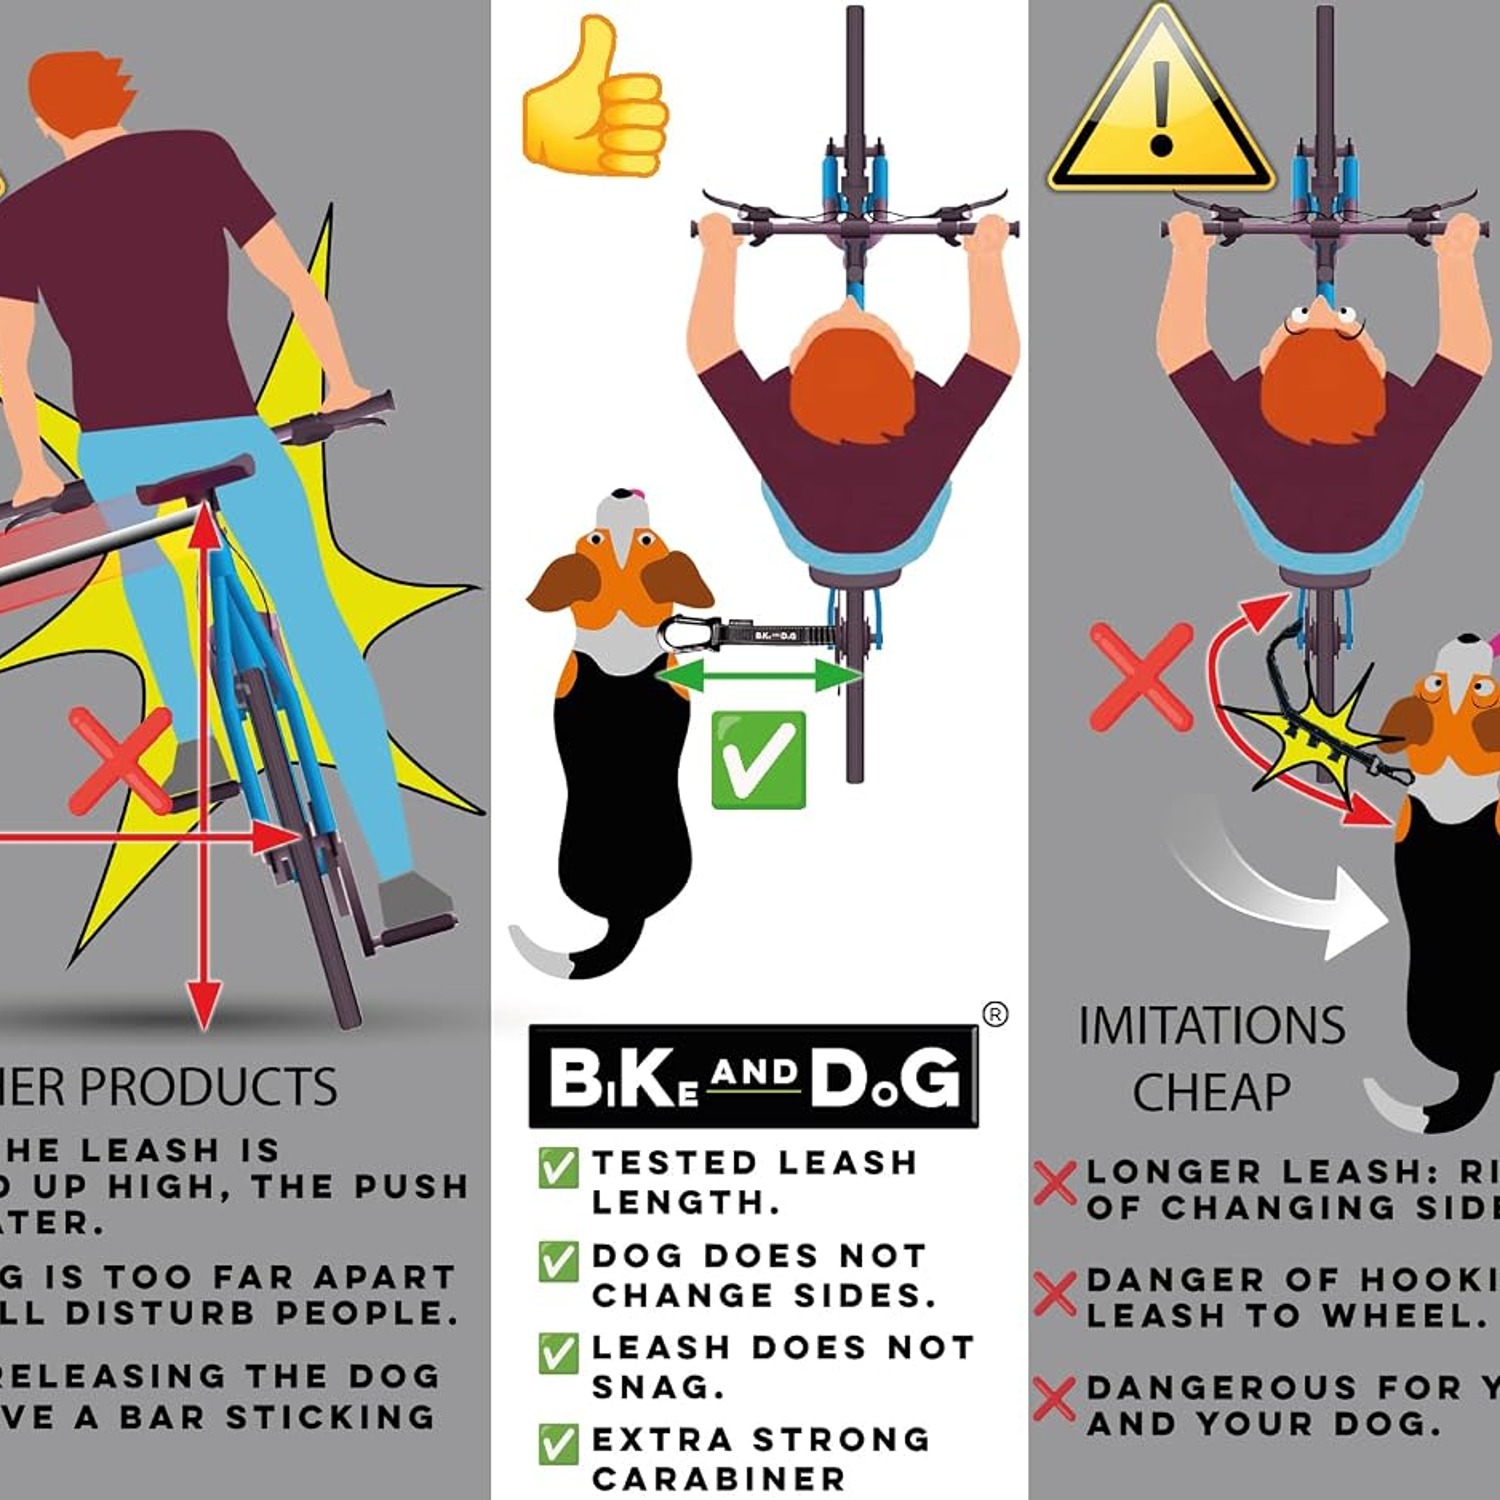
Anyone who has tried cycling with a dog on a normal lead knows the moment. The dog sees something interesting, swings across the front wheel, and your whole upper body follows the pull. Bikes do not like sudden sideways force at the handlebars. Neither do collarbones.
The other version is the lead that drops. One second of slack and it is in the chain or around a pedal, and now you are stopping fast with a dog attached to the drivetrain. It is not a small risk, and it is the reason most people give up on riding with their dog after one or two attempts.
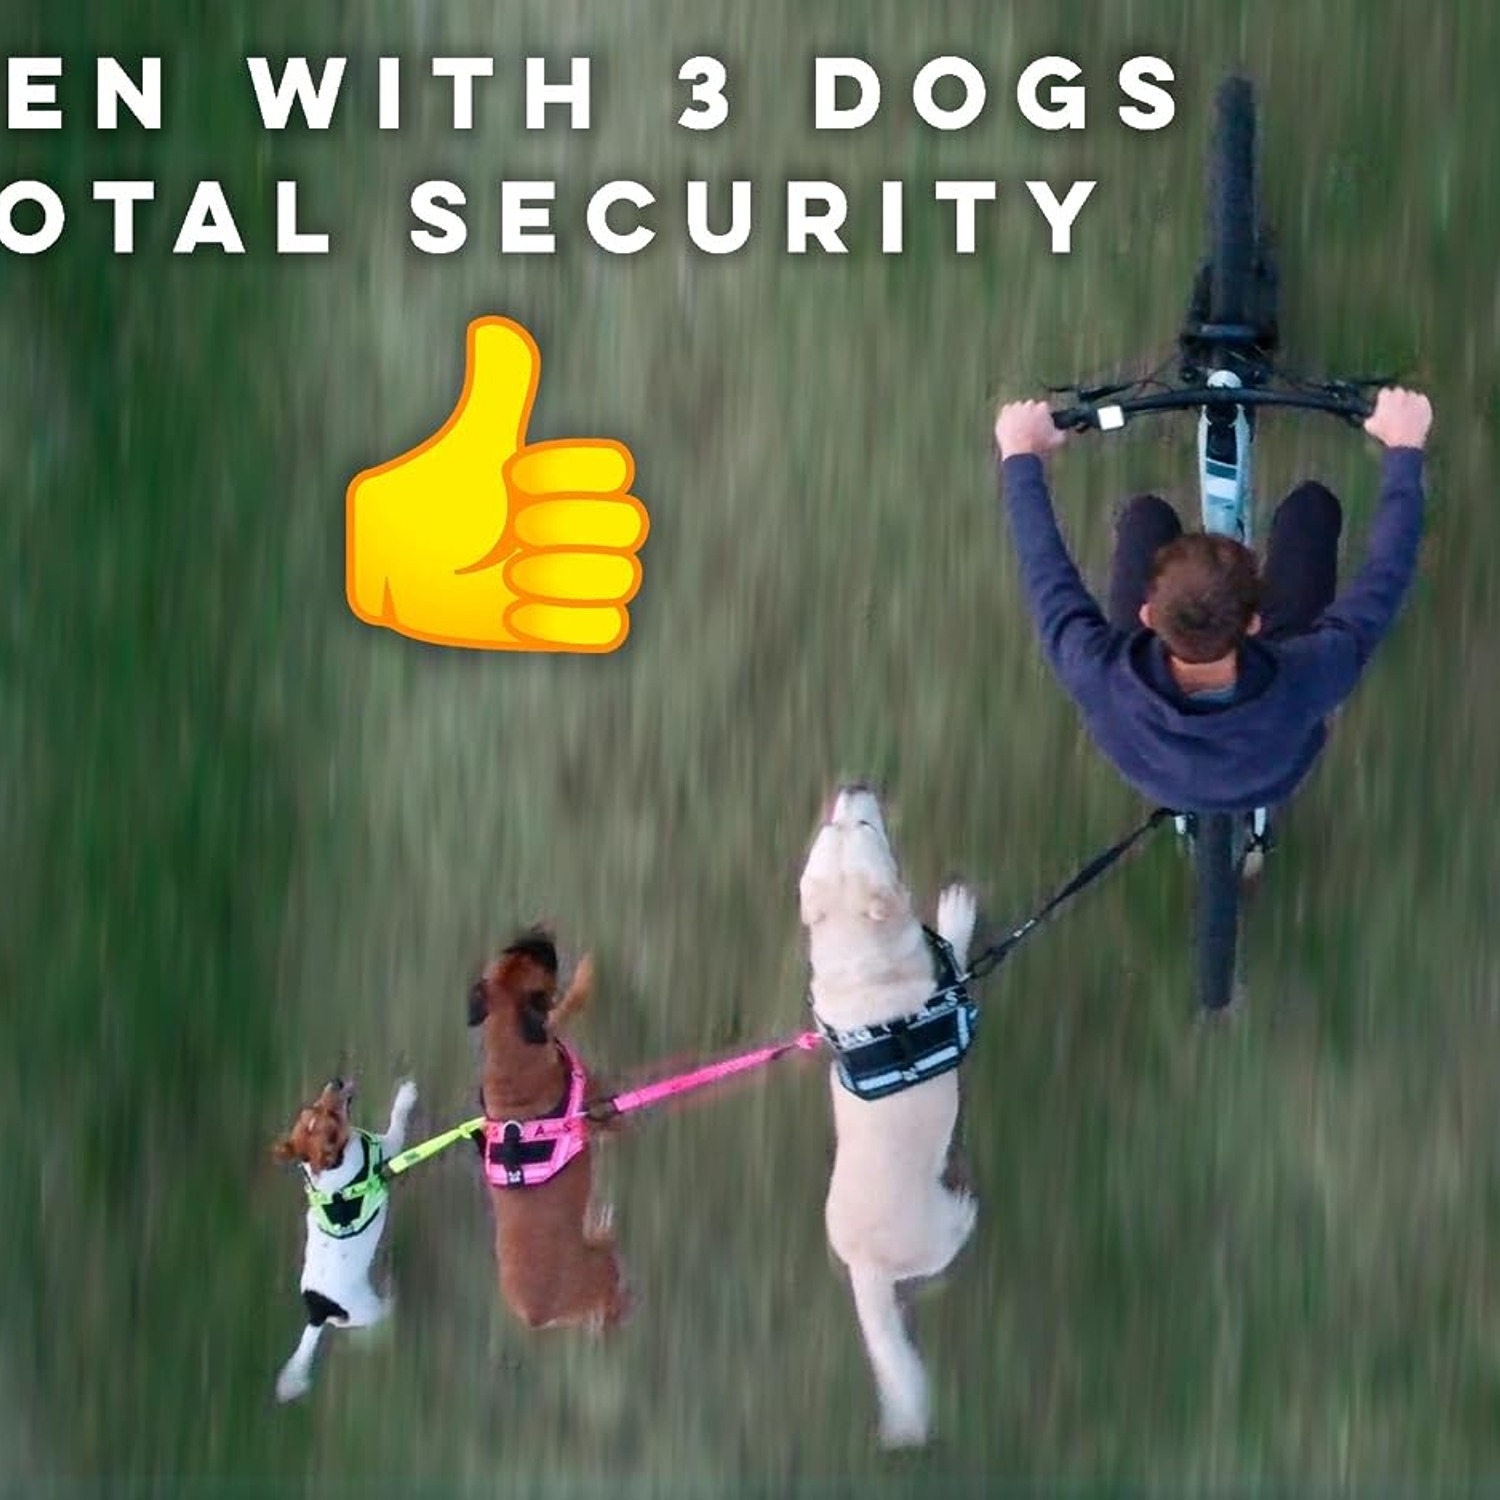
A bike tow dog leash solves this by changing where the force lands. Instead of running from your hand down to the dog, the leash runs from the bike frame out to a harness. The pull goes into the frame, low and behind the rider, where a bike is far more able to absorb it. Your hands stay where they belong, on the bars.
How this one works
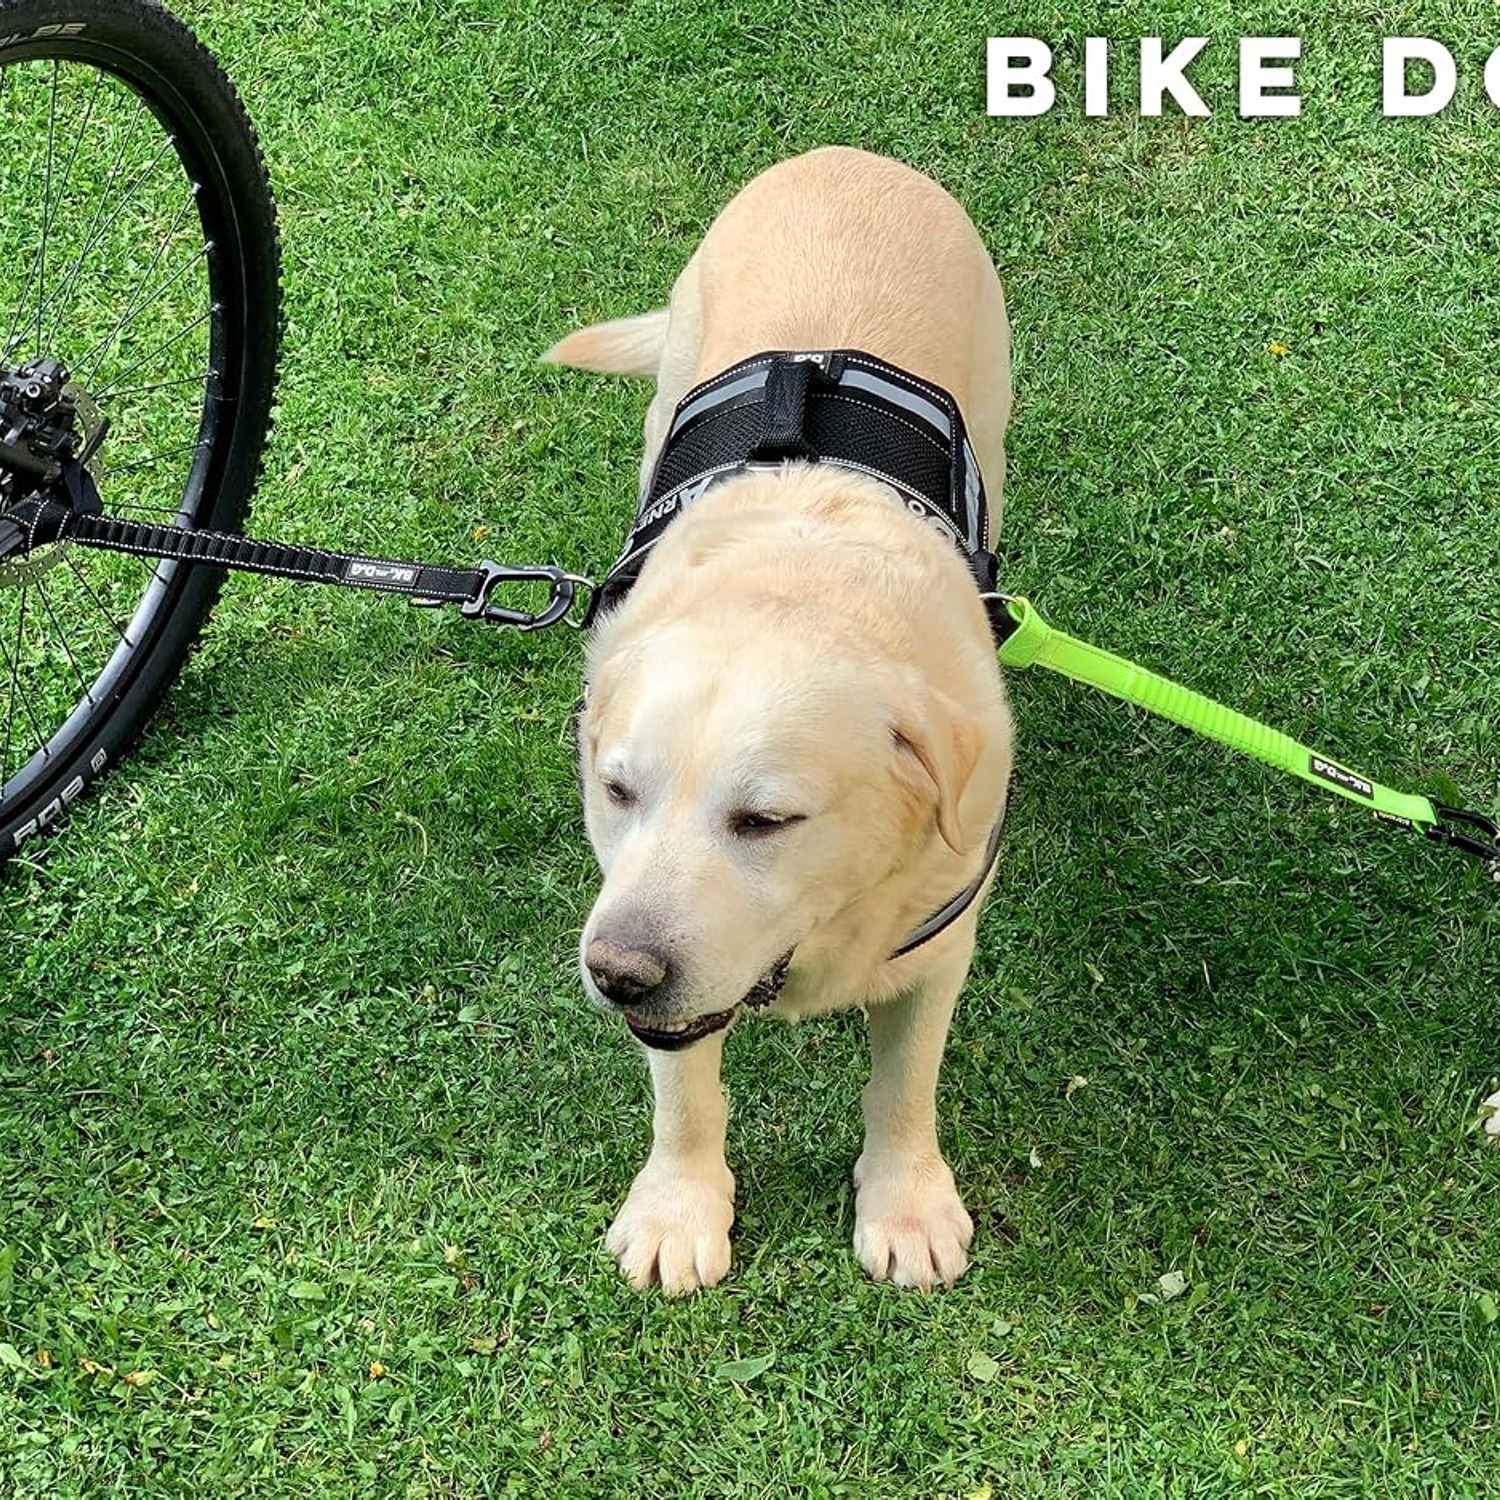
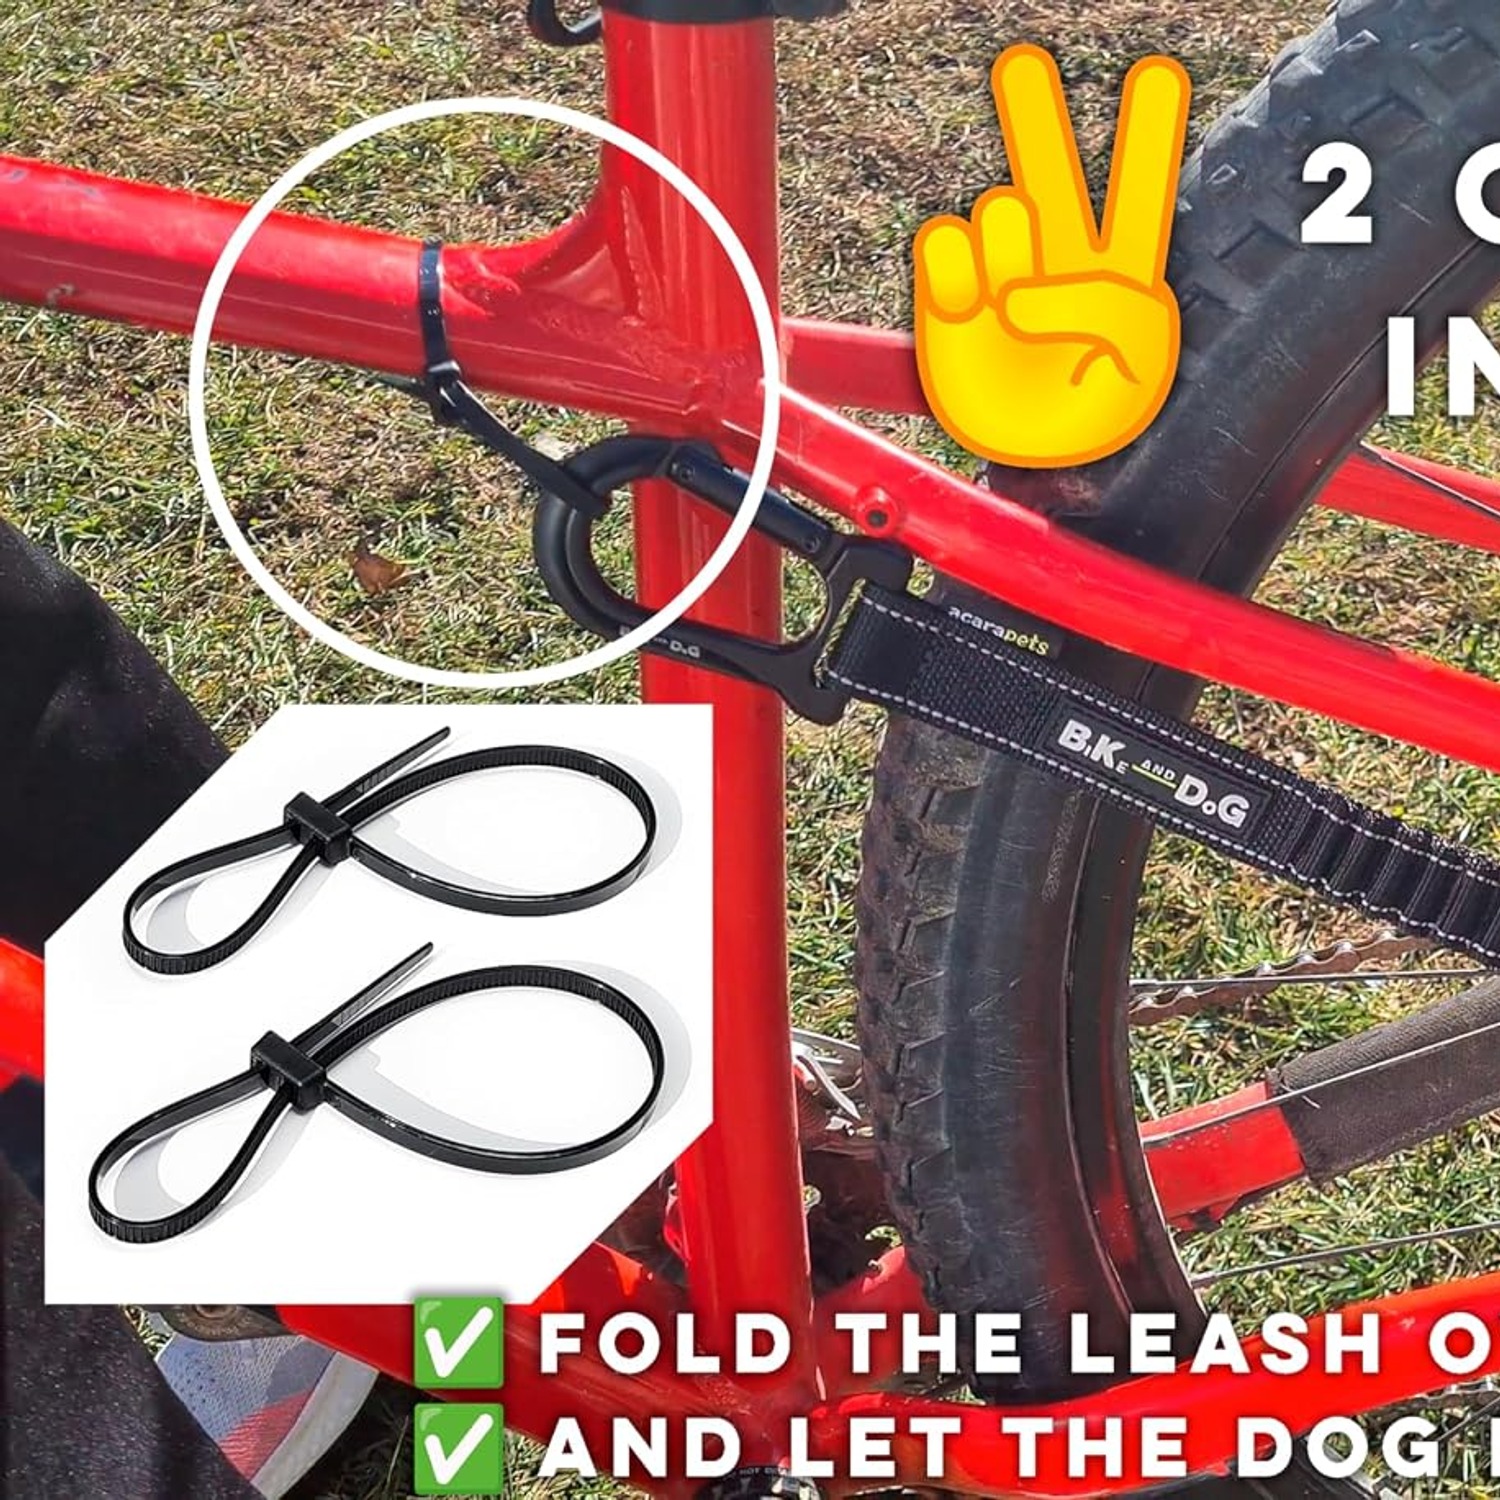
This set has three parts. There is the nylon tow leash, a harness with three metal rings, and two bicycle cable ties. The ties are the mounting hardware. That is the whole system.
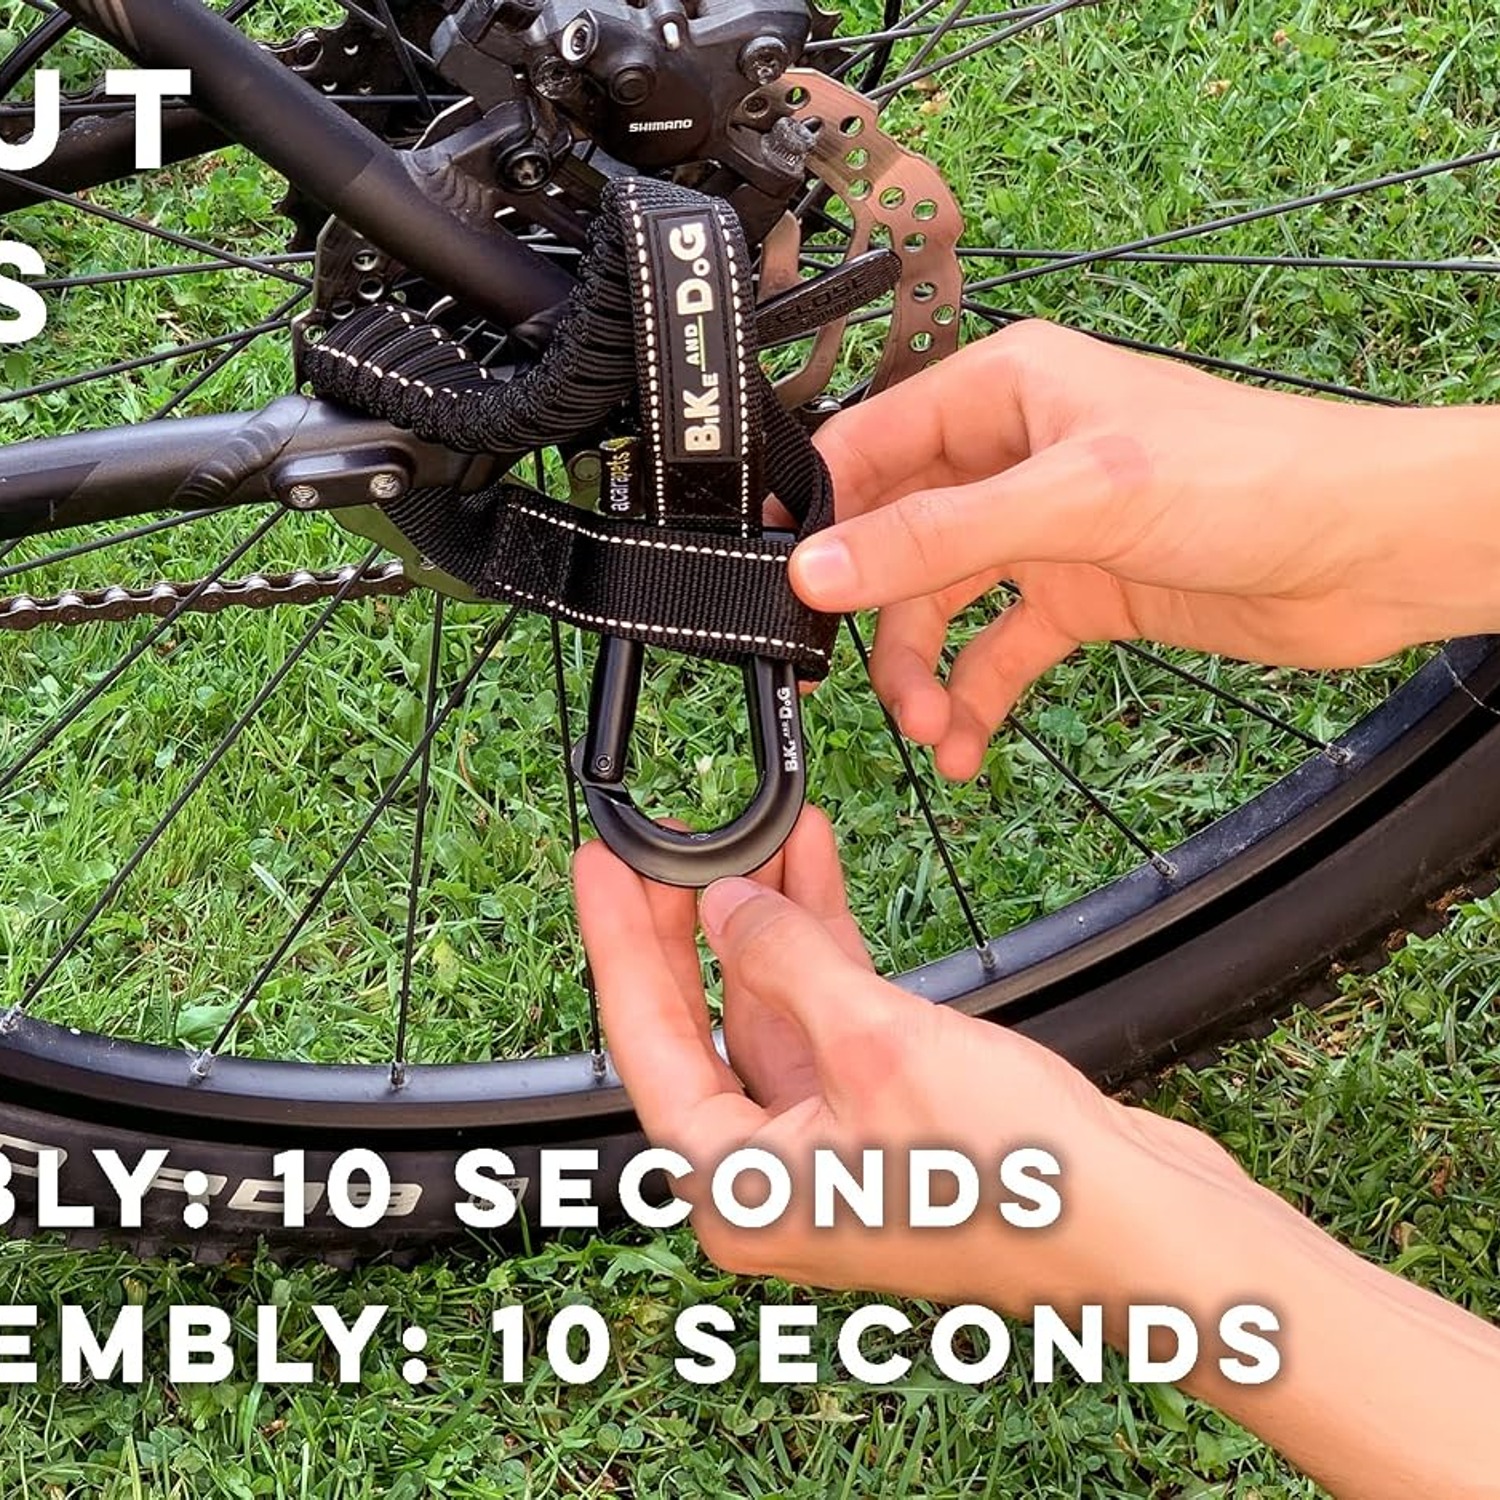
Because the ties do the holding, there is nothing to bolt on. No clamp sizes to match, no hex keys, no worrying about whether it suits an aluminium frame or a steel one. The maker describes fitting or removal as a ten second job, and that is about right once you have done it twice.
The harness end is where the thought has gone. Two of the three rings are side rings, so you can clip on whichever side suits the route and the dog. Side attachment keeps the pull across the body rather than dragging at the neck, and it gives the dog a more natural line beside the wheel. A quick release grip means you can unclip at a gate or a kerb without fighting a cold clasp with one hand.
When you are done towing, the leash folds back along the bike and the cable ties hold it there. This is a small feature that matters a lot. A tow arm left swinging near a spinning wheel is exactly the kind of thing that makes people remove the whole setup and then never bother refitting it.
Who this suits
The maker records the dog breed size as small. That is the honest starting point. If your dog is a terrier, a small spaniel, a mini poodle or something similar in build and strength, this is the right ballpark. If you have a large, powerful dog that pulls hard, check that size rating carefully before you buy, because no load rating is given by the maker and guessing is not worth it.
Fitness matters too. A bicycle dog lead does not make a dog fitter overnight. Short legs, flat faces, heavy coats and hot weather all cut what a dog can comfortably do. Young puppies with developing joints and older dogs with stiff hips should be walking, not trotting beside a bike. If you are unsure, a quick word with your vet settles it.
Rider skill is the third piece. You need to be comfortable riding one handed, stopping smoothly, and looking sideways without wandering. If any of that feels shaky, spend a week riding without the dog first.
Getting the fit right
Start with the bike on its stand or upside down, not in the street. Position the arm so it sits beside and slightly behind you, then turn the pedals and spin the wheel through a full rotation. Nothing should touch the arm, the leash or the ties. Give the mount a firm push from a few directions to check it holds.
Then fit the harness. It should be snug enough that you cannot pull it over the dog's head, loose enough that you can slide two fingers flat under any strap. Watch the armpits, which is where most rubbing starts. Let the dog wear it indoors for a while before it ever meets the bike.
Pick a side ring and clip on. Walk the bike beside the dog at a strolling pace with no riding at all. Do that a few times over a couple of days. Only then get on and ride slowly in an empty car park or a wide quiet path. Most of the training is just repetition at low speed until the dog stops treating the bike as a strange new object.
Riding together
Set the pace by the dog, every time. A comfortable trot for most dogs is a lot slower than your normal cycling speed, and that is fine. The point of a hands free bicycle dog leash is safe shared exercise, not a time trial.
Watch the dog more than the path at first. Heavy panting, a shortened stride, dropping behind the pace or trying to veer toward shade all mean stop. Take water. In warm weather, ride early or late and check the ground temperature with the back of your hand, because hot surfaces damage paw pads quickly.
Plan a route with soft surfaces where you can. Grass verges, packed dirt and park paths are kinder on joints than hot bitumen. Avoid busy roads, not because the leash will not hold, but because traffic noise and close cars make dogs tense, and a tense dog is harder to read.
When the dog starts to lag, that is the end of the ride, not a prompt to push on for another kilometre. Unclip, switch to a walking lead, and finish on foot.
Looking after the gear
Nylon is easy, which is part of why it is used. Rinse the leash and harness in cool water after muddy, sandy or salty rides and let them dry in the air rather than the sun. If a rinse is not enough, mild soap and a cloth will do it. Keep bleach, hot washes and the tumble dryer away from it, since heat and harsh chemicals weaken webbing over time.
Check the metal rings and the snap closure for grit and for any sign of distortion. Run your fingers along the stitching, especially where the leash meets a ring, which is where wear shows first.
The cable ties deserve their own check. Plastic stiffens with sun and age, and a tie that looks dull or chalky is near the end of its life. Keep a couple of spares and change them before they crack rather than after. Store everything dry and loosely coiled, not knotted in a damp shed corner.
The short version
Riding with a dog goes badly when the lead is in your hand and well when it is on the frame. This set gives you the leash, a three ring harness with side attachment and a quick release, and the two ties that mount it, all fitted without tools in roughly ten seconds. It weighs 130 grams, it is black nylon, and it folds flat against the bike when you are not using it.
Check the small dog size rating against your own dog, fit it carefully with the bike stationary, and build up slowly over a week or two of short, quiet rides. Do that and you get the thing most dog owners actually want, a tired, happy dog and a ride where both hands stayed on the bars.